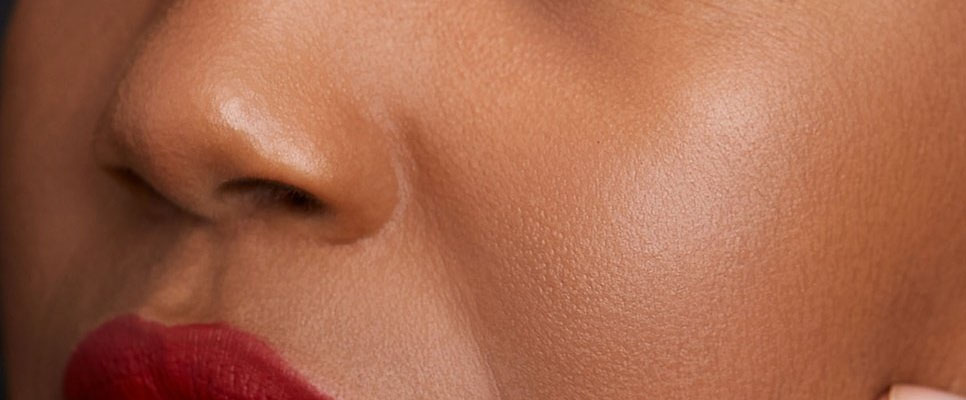
How to Get a Wrinkle-Free Makeup Foundation: Smooth Skin Secrets
If you've ever applied foundation only to notice it settling into fine lines and wrinkles minutes later, you’re not alone.
If you've ever applied foundation only to notice it settling into fine lines and wrinkles minutes later, you’re not alone. Many people struggle with getting their makeup to look smooth and natural, especially as skin matures. The good news is that with the right prep, products, and techniques, you can achieve a flawless, wrinkle-free foundation finish, no makeup artist required.
This blog will walk you through each step of creating a smooth, long-lasting base that won’t crease, cake, or emphasize texture. Whether you’re getting ready for a big event or perfecting your everyday look, these practical and easy-to-follow tips will help your foundation stay fresh and youthful all day long.
Why Foundation Settles Into Wrinkles?
As we age, our skin naturally becomes drier and loses some of its elasticity. This makes lines, creases, and texture more noticeable. When foundation is applied to skin that isn’t properly hydrated or prepped, it can cling to these areas instead of smoothing them out. The result is makeup that highlights rather than hides imperfections.
Foundation can also settle into wrinkles if it's too thick, too matte, or applied with the wrong tools. That’s why it’s important to approach makeup application with care, starting from your skincare routine all the way to how you set your makeup.
Step 1: Start with Proper Skin Prep
Great makeup begins with great skincare. If your skin is dry, flaky, or uneven, even the best foundation won’t sit well. Start by cleansing your face with a gentle cleanser to remove any dirt, oil, or leftover product. Avoid anything too harsh that could strip your skin of moisture.
Next, exfoliate once or twice a week to remove dead skin cells. This helps create a smooth surface for your foundation to glide over. Look for gentle exfoliants like lactic acid, polyhydroxy acids (PHAs), or fruit enzymes. Be careful not to over-exfoliate, especially if your skin is sensitive.
After exfoliating, apply a hydrating moisturizer that suits your skin type. Choose one with ingredients like hyaluronic acid, glycerin, or ceramides to keep your skin plump and moisturized. Let it absorb for a few minutes before moving on to your makeup routine. If you’re applying makeup in the morning, don’t forget to use sunscreen—sun damage is one of the biggest causes of fine lines.
Finally, apply a lightweight eye cream to hydrate the under-eye area. This part of the face is especially prone to creasing, so giving it a moisture boost will help your concealer and foundation sit better.
Step 2: Use a Primer That Suits Mature Skin
Primers create a smooth base for foundation and help minimize the appearance of lines and pores. If you have mature or textured skin, choose a primer that is hydrating or smoothing, not one that mattifies or dries out the skin.
Silicone-based primers are great for blurring fine lines and filling in uneven areas, while hydrating primers provide a boost of moisture and prevent foundation from clinging to dry patches. For added glow, you can use a radiant or illuminating primer that gives your skin a youthful sheen.
Apply a small amount of primer to the areas where you notice the most texture, like the forehead, smile lines, and around the eyes. Use your fingers to gently press it into the skin.
Step 3: Choose the Right Foundation Formula
When it comes to foundation, not all formulas are created equal, especially for wrinkle-prone skin. Avoid thick, heavy foundations or anything that says “matte” or “long-wearing” without hydration. These often dry down too quickly and can settle into fine lines.
Instead, go for light to medium coverage foundations that are buildable. These allow you to layer where needed without caking. Look for foundations that include skincare ingredients such as hyaluronic acid, squalane, or peptides. These formulas hydrate and nourish the skin while providing a smooth finish.
Stick to liquid or cream foundations with a radiant or satin finish. These are more forgiving on textured skin and give you that natural, healthy glow. Avoid powder foundations as they can highlight dryness and lines.
Step 4: Apply Foundation the Right Way
How you apply your foundation makes a big difference. One of the best tools for a smooth, wrinkle-free finish is a damp makeup sponge. Sponges press the product into your skin without dragging it, which helps avoid creasing and gives you an airbrushed effect.
Start by applying a small amount of foundation to the center of your face and blend outward. Build coverage slowly, only adding more where necessary. Avoid overloading your skin with too much product, this is a common mistake that causes foundation to settle into lines.
Use a tapping motion rather than swiping or rubbing. This technique helps the foundation blend evenly without disturbing the skin underneath.
Step 5: Use Concealer Sparingly and Strategically
Concealer can brighten and lift your face, but too much of it can quickly settle into lines, especially under the eyes. Use a creamy, hydrating concealer that won’t dry out or crack as it sets. Apply a tiny amount, just enough to cover darkness or discoloration.
Use your ring finger or a damp sponge to gently tap the concealer into the skin. Be sure to blend well to avoid harsh lines. If your concealer tends to crease, apply a tiny bit of setting powder (more on that next) to keep it in place.
Step 6: Set Your Makeup Without Drying Out Your Skin
Setting your foundation helps lock everything in place, but the wrong powder can age your skin. Skip heavy powders that give a matte or cakey finish, and instead choose a lightweight, finely milled translucent powder. Use it only on areas that tend to get oily or where creasing happens, like the T-zone or under the eyes.
Use a soft, fluffy brush to dust the powder lightly, or press it in with a damp sponge for a more natural finish. Less is more here, the goal is to set, not to mask your skin.
If you want to bring back a bit of glow after setting, mist your face with a hydrating setting spray. This helps melt all the layers together and leaves your skin looking fresh and radiant.
Step 7: Refresh During the Day (If Needed)
Even the best makeup can crease slightly throughout the day, especially in areas where the face moves a lot, like around the eyes or mouth. If this happens, don’t panic. Just take a damp sponge and gently press over the area to smooth out the creases. You can also spritz your face with a facial mist to rehydrate and revive the look.
Avoid layering more product over creased areas, this usually makes it worse. Instead, focus on re-blending and hydrating.
Wrinkle-Free Foundation is Achievable
Getting a wrinkle-free foundation finish doesn’t require expensive products or hours of effort. It’s all about knowing your skin, prepping it properly, and applying makeup in a way that enhances rather than hides your natural beauty. With the right techniques and a little care, you can enjoy a smooth, glowing complexion every day, no matter your age. So take your time, treat your skin kindly, and remember: makeup should feel good, not stressful. The next time you reach for your foundation, follow these steps and watch how your makeup transforms from fine-line filler to flawless finish. Smooth it out, glow on, and enjoy the confidence that comes with skin that looks and feels amazing.
Subscribe
You will receive the latest news and updates on your favorite celebrities!
Latest posts

Comfortable Walking Gear That Makes Every Dog Walk Easier
Every dog deserves comfort, safety, and freedom during daily walks, playtime, and training.


GrayMatter: Help Your Mind, Support Your Goals, Live Better
We all want to feel good in our bodies and minds.